Do-It Yourself Carb Modifications to the Keihin CV Carb
The following mods need to be done to your Keihin CV Carb so that the carb will properly work with the CV Carb Kit. The carb originally mounts to a H-D with a rubber joint between the carb, and the manifold, and their air cleaner pushes-on, and holds the carb up against this rubber sleeve without hose clamps. I grind (2) places so that the new rubber hose will go on further, and get a better "purchase" on the carb spigot. These are shown below. The original throttle cable support bracket , in all cases needs to be angled down so the new throttle cable won't hit your left petcock. I show here the various brackets that I have seen, and how to modify it if needed. The cable linkage on the throttle shaft needs to be ground down some for clearance at the rear cylinder fins. I tried to get the carb as close in as possible, and by grinding this area, the carb/ air cleaner will not stick out any more than 1/2" farther than normal. I show the area to grind below. There is a small spot on the float bowl to file down where the new carb support bracket mounts, so it will fit up tight, and flush. Last, sometimes the plastic fuel inlet will be cracked, and it will leak. H-D dealers sell an "L" fitting in brass, and this can be permanently repaired. Each item is covered below.
If you are not interested it doing these mods yourself, I can do them for you. I do all of the grinding, and welding for $25.00, and seperately, I will replace the Fuel fitting for $30.00 (including the part).
Grinding for Rubber Hose Clearance
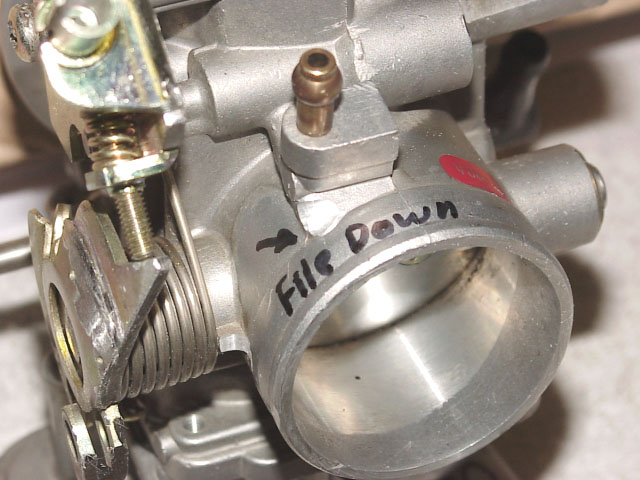
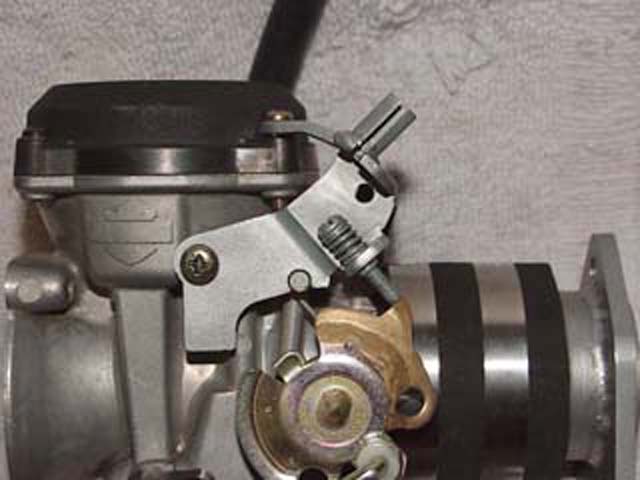
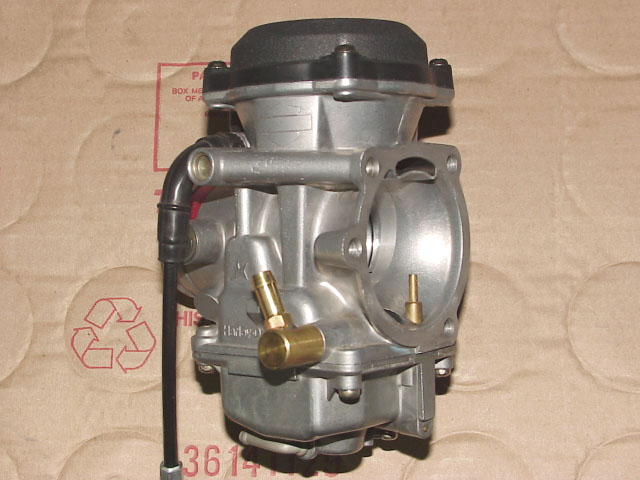
On the top of the carb spigot there is a hump approaching the vacuum port. Some of this material can be filed, or ground down with a Dremmel tool. Trimming this area down slightly will help the new rubber sleeve to smoothly go on a little further. This area is very thin, and it is easy to grind too far, and expose the passage below. If this happens, a little JB Weld (JB Kwik!) can be used inside the passage to fill the hole (but do not block the passage). This is very delicate work, and only a very little bit of material should be removed. Study the picture closely!
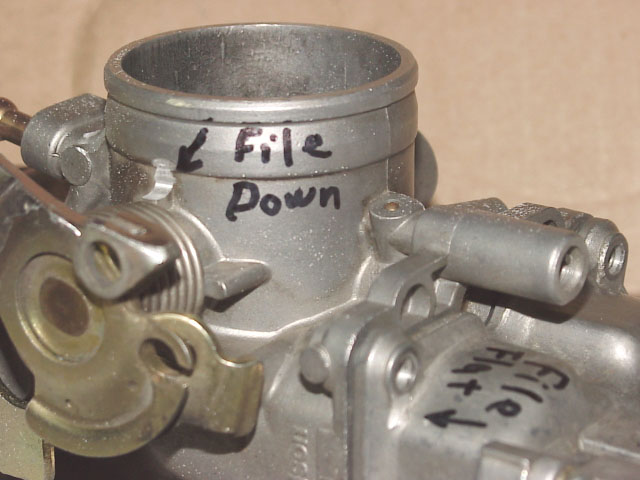
On the side of the carb, where the spring is near the carb spigot, there is a stop for the spring. This can be filed, or ground back some so the new rubber hose will be able to be pushed all the way on. Do not file this tab all the way off. Study the picture closely!
Float Bowl Mod for Carb Support Brace
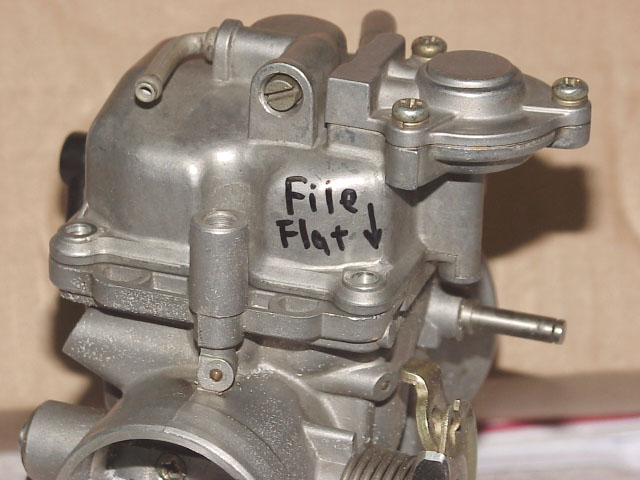
Sometimes, there are little casting "High-Spots" that need to be filed down flat, so that the new carb support brace will fit up tight, and square to the surface.
Carb Throttle Cable Bracket Modification
The above pictures show the original cable angle on the left. This cable angle may cause the cable to interfere with the left petcock. The picture on the right shows the new lower cable angle.
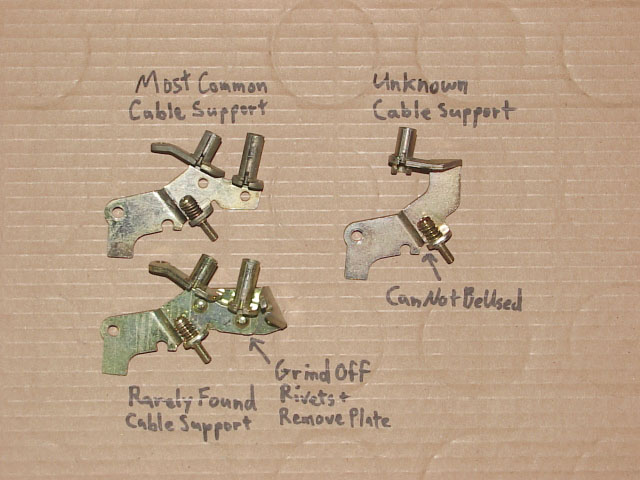
The above picture shows the (3) different types of throttle cable brackets that I have seen. The one on the top left is the most common. The one below is the same, except that it has another bracket riveted onto it. Grind off the (2) rivets, and pry this bracket off. The bracket on the right is very rare. I have only seen one of these, and I don't know what it is used for. It can not be used! Another proper bracket must be found. They can be bought at the H-D dealer.
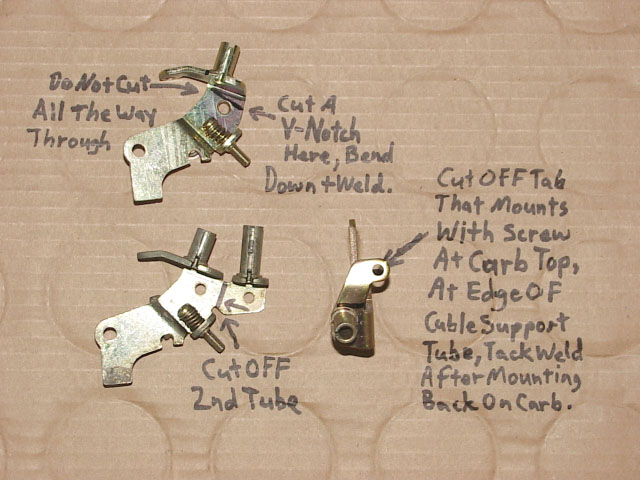
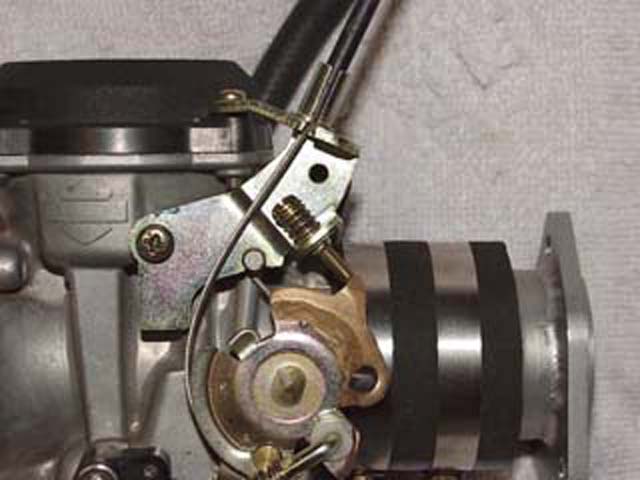
This picture shows markings showing where to make hack-saw cuts to prepare the bracket for re-welding. The second cable tube should be removed, and tossed. The V-cut does not go all the way through. The V-cut allows the cable tube to be bent downward. The tab where the top screw is must be cut off first before cutting the V-cut, and both pieces are re-mounted, and tack-welded.
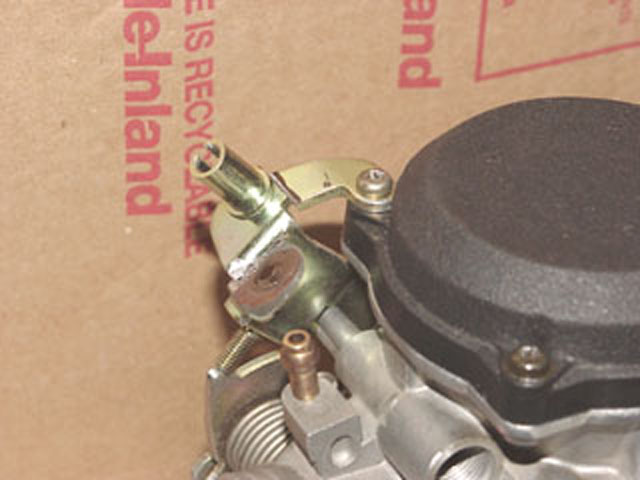

The pictures above show the (2) bracket pieces re-installed before tack welding. Be sure to have the slide/diaphram removed, and a bowl of water handy to drop the top of the carb in immediately after tack welding, so you don't melt the plastic carb top! Remove, and finish welding. I use a Tig welder for this, because it is quick, and it won't melt the carb top.
Replacing the Plastic Fuel Fitting
This picture shows the new "High-Flow" brass fuel "L" that replaces the original plastic piece. The plastic "L" breaks easily, and this is why so many of these carbs have been replaced. There is about a 50% chance that your used carb is broken here. This part can be bought at any H-D dealer for around $15.00 (part number 27371-76A). To remove it, fully dis-assemble the carb, and on a good drill press, use a drill bit near .275", and carefully drill through the remaining brass fitting that is inside the broken-off plastic "L". Then use an Easy-Out, and carefully twist out the old brass. Be very careful to not let the drill bit come in contact with the inside bore of the carb where the fitting presses in! Remember, you have ONE shot at getting this right! To get the new fitting in, place the edge of the carb body firmly on a heavy surface like a vice, and gently tap it in with a light hammer. First, use a propane torch to gently heat the area for about (1) minute. Look at the picture for correct positioning of the "L".
Please Note: Every rebuilt Carb that I sell already has these mods done to the carb!
Important-Read Each Catagory Below for Full Details!